Project Square

Instagram is a mobile, desktop and internet-based sharing app that allows people to share their pictures and videos either publically or privately. It was created by Kevin Systrom and Mike Krieger and launched in October in 2010. The app allows you to upload pictures and videos with the digital filters to there the pictures and videos; it also allows you to add locations using geotags. The app allows you to create hashtags, which allows pictures to link to other profiles. The most confining thing about the app is the square feature however this was changed in 2015. The app allows people to message each other through direct messages and the app is become more of a business tool right now. This type of social media is now recognised as a platform to endorse themselves from products, merchandising and clothing. The app has reached 800 millions accounts in 2017 with over 40 billions photo uploads in October 2015.


My intake
For my minor I will be taking pictures that are inspired from Instagram profiles that I follow. The project will be called ‘project square’ as this platform is known for their stereotypical square framing to upload their pictures. They do give the options to not have them as a square crop but most photography pages do follow the standard rule of thirds grid square way. From the pages I will be taking inspiration from are pages like Milk, Lilybrown91 and Theodore_uriah. They all have the same of style in terms of retro side of Instagram. They all have fashion in common as well as abstract pictures. So I will focusing on that concept of fashion and abstract photography and cropping it into a square framing with the editing being my perception of Instagram pictures, which is a retro, vintage vibe. The editing within these pictures usually has bright colours or very de saturated retro colours. They are often so simple yet so beautiful or they can be very complicated with a big message. Instagram is a very big platform for photographers showcasing their intake of art and creating exposure for their work.
First shoot
Waterloo, London


For this shoot I went out Southbank in Waterloo, whilst I was out I took the camera out with me and took pictures whilst my friends and I were out. This was inside in the arcade in the Southbank; they were playing on the dancing machine. I thought this had a nice aesthetic with the colours and movement within the picture. This picture conveys some girls having fun and a breach of colours. To edit I used the curves, brightness, levels and increased the vibrancy. Then I used dark purple solid colours, used a light colour-blending mode and lowered the opacity. After I used a dark blue solid colour, using a exclusion blending mode, then lowering the opacity. Finally I used a orange solid colour, used a dark colour blending-mode and lowered the opacity. I cropped this into a square width.


I took some pictures of my friend’s shoes, as taking pictures of shoes is very in right. I used a low f-number to have the main focus on the Vans shoe, having the Doc Martins blurred in the background. I used the crop tool to make it into a square format. Then I used the curves, played with the vibrancy. After I used the selective colour and played with the colours, especially the white colour.
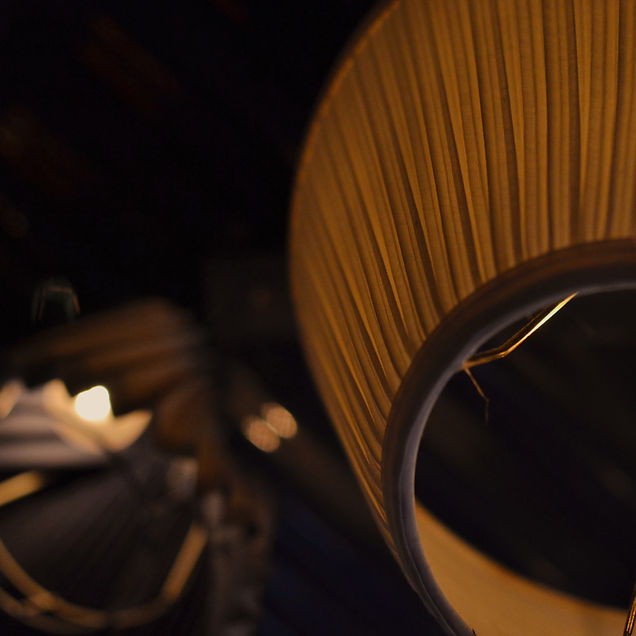

This was a light shade in a bar in waterloo. They had a very quirky décor inside the bar with all these lights and displays. To edit this I used the curves, played with the vibrancy and used the selective colour to play with the yellow colours. Then I used a brown solid colour, with a pin light blending-mode and lowered the opacity. Finally I cropped this it to a square format.


This was the window in the bar that we went to. I took a picture of the window because I liked the colours; it gave off a church feel. To edit I played with the curves, increased the vibrancy and used the selective colour to brighten the greens, blues and red in the picture. After I used the rectangle tool and using the eyedropper tool to replicate the same colours from the window. Next I used a blending mode and lowered the opacity to create the transparent effect. After I cropped the picture into a square format.


We were in the arcade in this picture; my friend was sitting on a arcade game. I took this from a low angle. To edit cropped the image with the crop tool to make the square width. Then I played with the curves, then used the vibrancy tool and played with the selective colours to brighten up the bold colours from the background. Then I used a burgundy solid colour, used a blending mode and lowered the opacity to add a colour tone on the surface.


This was from the art design in the bar, it was some fake greenery inside the bar. I took this from a high angle. To edit I used the cropped tool, then played with the curves and brightness. I made it black and white and adjusted with the filters with the black and white tool. I liked the way the leaves were darker then the background due to the lights.


This was a real plant near the window in the bar as well. I first cropped the image with the cropped tool. Then I played with the curves, to reduce the shadows and making the film aesthetic. Then I played with the vibrancy and used the selective colour to brighten the orange shades. After I used a solid colour.
Shoot two:
Plaistow, London


I took inspiration for this from @Milk's page on Instagram. I liked the use of the sexual pose with the colouration of red in the make up and editing from the original. I used a ring light and a white wall to take this. I used a low f-number, this allowed me to have a shallow depth of field, making the main focus on the face and within the eyes. To edit I played with the curves, played with the curves and used the selective colour. i made her skin appear more tan and her make up bolder. I used the crop tool to crop it into a square shape.


This was taken in the same way, mainly focusing on her facial expression and taken very close up. To edit i used the crop tool to make the swuare shape. then I played with the curves, used the vibrancy tool and played with the selective colour. Then I used a red solid colour, using a blending mode and lowering the oapcity to add more of a red tone in the picture and her skin.


These are other pictures I took but I wasn't happy about cropping them because they offered so much uncrop in a square format. I left it in its normal picture state. I thought i would include it into my work, it wouldn't count as a square Instagram inspired picture, however in terms of editing it does. I like the way her eyes look in the picture. The ring light really helped with the quality of the picture. I did experiment with many angles from close ups to portraits. The editing was the same process as the others.


This was taken with my Iphone 7. As most Instagram pictures are actually taken with mobile phones and I wouldn't always have my camera with me. I thought why not take some with my phone. Some pictures are taken with a Iphone or with a DSLR. This was taken in a park, on a sunny day we were eating strawberries. The colour of the strawberry and her glasses match so iI thought this would look aesthetically pleasing. To edit I played with the curves, brightness and vibrancy. Then i used a purple gradient colour, using a blending mode and lowering the opacity to create this faded look in the picture.
Shoot three
North Woolwich, London


The inspiration for this shoot was also from @Milk from Instagram. Most of the pictures were taken spontaneously and I used this plastic flower has the main factor within all my pictures.I used natural lighting
and we took pictures inside his flat building window and outside his flat. I used a 50mm camera to gain a raw focus in some pictures, his facial expressions does it all in some pictures. To edit I first used the curves to get rid some shadows and fix the lighting to make some pats sharper. Then I used the vibrancy tool to brighten the colouration. Next I decided to make the picture black and white, as it looked more powerful with the juxtaposition of his skin tone and the white flower. I made the duplicate layer have a blending mode of hard light and lowered the opacity down to make his skin appear sharper and some other details. Next I used the line tool to draw on multiple lines across the image to create this effect. I liked the final outcome of this image, it quite interesting and creative.


This was taken outside of his flat building. I picked some daisies from the grass and used it as the subject in the picture. Nature is a most from today's Instagram inspiration pictures. To edit I used the crop tool to make it a square shape. Then I played with the curves, vibrancy and selective colour. I used all the colours that it offered to manipulate the sky and to his face. this helped shape it have this retro aesthetic, which I generally tried to gain from editing my pictures.


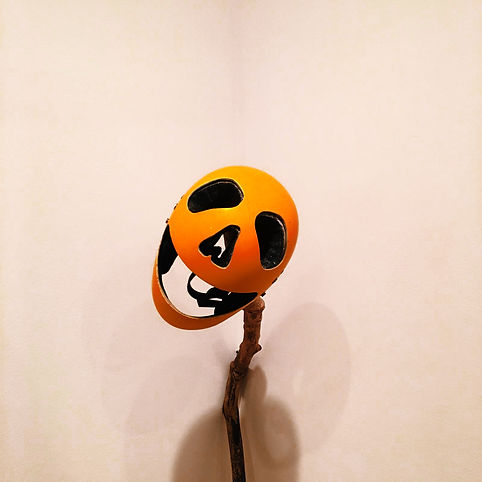
This was the plastic flower I used throughout the shoot. i decided to hold it up to the sky in front of the sun. This just looks pretty to look at. I had no purpose for this just took it just for fun. To edit I used the curves to darken the sharpness in the detail within the picture, then I increased the vibrancy of the sky and the flower. Before all of this I did crop it first. After I used the selective colour, mainly using the yellow and red tone to control the colours inside the flower to make appear more like a sunflower. Finally I played with the blue and white o control the intensity of the sky.


This was taken behind a window with natural lighting. To edit I used curves, vibrancy. I liked the natural colouration of the picture so I decided not to change around with the colours. Instead I used the rectangle tool and placed it in front o his face and changed the colour to a bright orange. I changed the blending-mode and lowered the opacity. I thought it would look interesting and add some colour.


This is a normal garden which could represent many things, such as the East London lifestyle. I liked the realness and the colours of the picture. To edit there wasn't much done, just played with the curves and imcreased the vibrancy and decreased the saturation a little.


I had my friend crouching onto the floor behind these bars of his flat building. This idea of taking pictures behind bars gives a good effect as well as has a imprisonment feel to it. To edit I used the crop tool, then the vibrancy and the curves. Then I did try to make it look nice with the natural colours but didn't like it. So i changed it to black and white which had more of inpact with the shadows.


I used the plastic flower to create this misty blurry effect in front of he lens. To edit I used the crop tool and the curves to sharpen the highlights and shadows. Then I used increased the vibrancy and de saturated the picture. After I used the selective colour to ply around with the colours. I wanted to make the sky appear more teal.
Shoots three, four and five.
Multiple locations / final gallery